Connect to Shopify
The Shopify plugin allows individual sellers to connect their Shopify store to any Traide-powered marketplace. This article explains how to activate the integration, and how data flows between the two systems.
Key benefits
The Shopify integration provides the following key benefits:
-
Marketplace configuration: Marketplace operators and sellers can configure their own integration for their Shopify store and choose which data is synchronized.
-
Seamless product listing: Sellers can sign up and import their Shopify products without the need to separately manage their product catalog on your marketplace.
-
Flexible pricing: You can choose to enable price sync to keep product prices in Shopify synced to Traide, or keep the pricing strategy separate between the two systems.
-
Data syncing: Shopify serves as the source for inventory and product information, ensuring that all imported products are up-to-date and accurately reflected in the marketplace.
-
Fulfill orders from Shopify: Sellers can continue to use Shopify as their primary Order Management System for orders placed on a Traide marketplace. With order sync, order cancellations and fulfillments from Shopify will be synchronized back to Traide.
Before you connect Shopify to Traide, consider how much control you need over your product taxonomy. Product templates and attributes are created automatically from Shopify, and these likely will not be standardized across the other sellers on your platform.
Allowing sellers to connect to Shopify
As a marketplace operator, to allow your sellers to connect to their Shopify stores you must configure the following:
- Ensure that the seller staff members who will be configuring the plugin have the necessary permissions:
- Manage apps
- Manage plugins
- Enable the Allow seller configurations? setting in the Traide app for Shopify. This allows sellers to access and configure the plugin for their Shopify store.
Connect a Shopify store
The following sections explain how to connect to a Shopify store and import your product catalog as a seller on a Traide-powered marketplace.
Step 1: Create an app in Shopify
You'll first need to create a custom app in your Shopify account in order to grant Traide access to your product catalog and other store information.
Follow the instructions in the Shopify Help Center to create and install a custom app.
Shopify Admin API access scopes
When configuring Admin API scopes for your custom app in Shopify, be sure to grant the correct access scope for the types of data you wish to import and synchronize:
| product import | product sync | price sync | inventory sync | order sync | |
|---|---|---|---|---|---|
read_products | ✅ | ✅ | ✅ | ||
read_inventory | ✅ | ✅ | |||
read_locations | ✅ | ✅ | |||
read_fulfillments | ✅ | ||||
read_orders | ✅ | ||||
write_orders | ✅ |
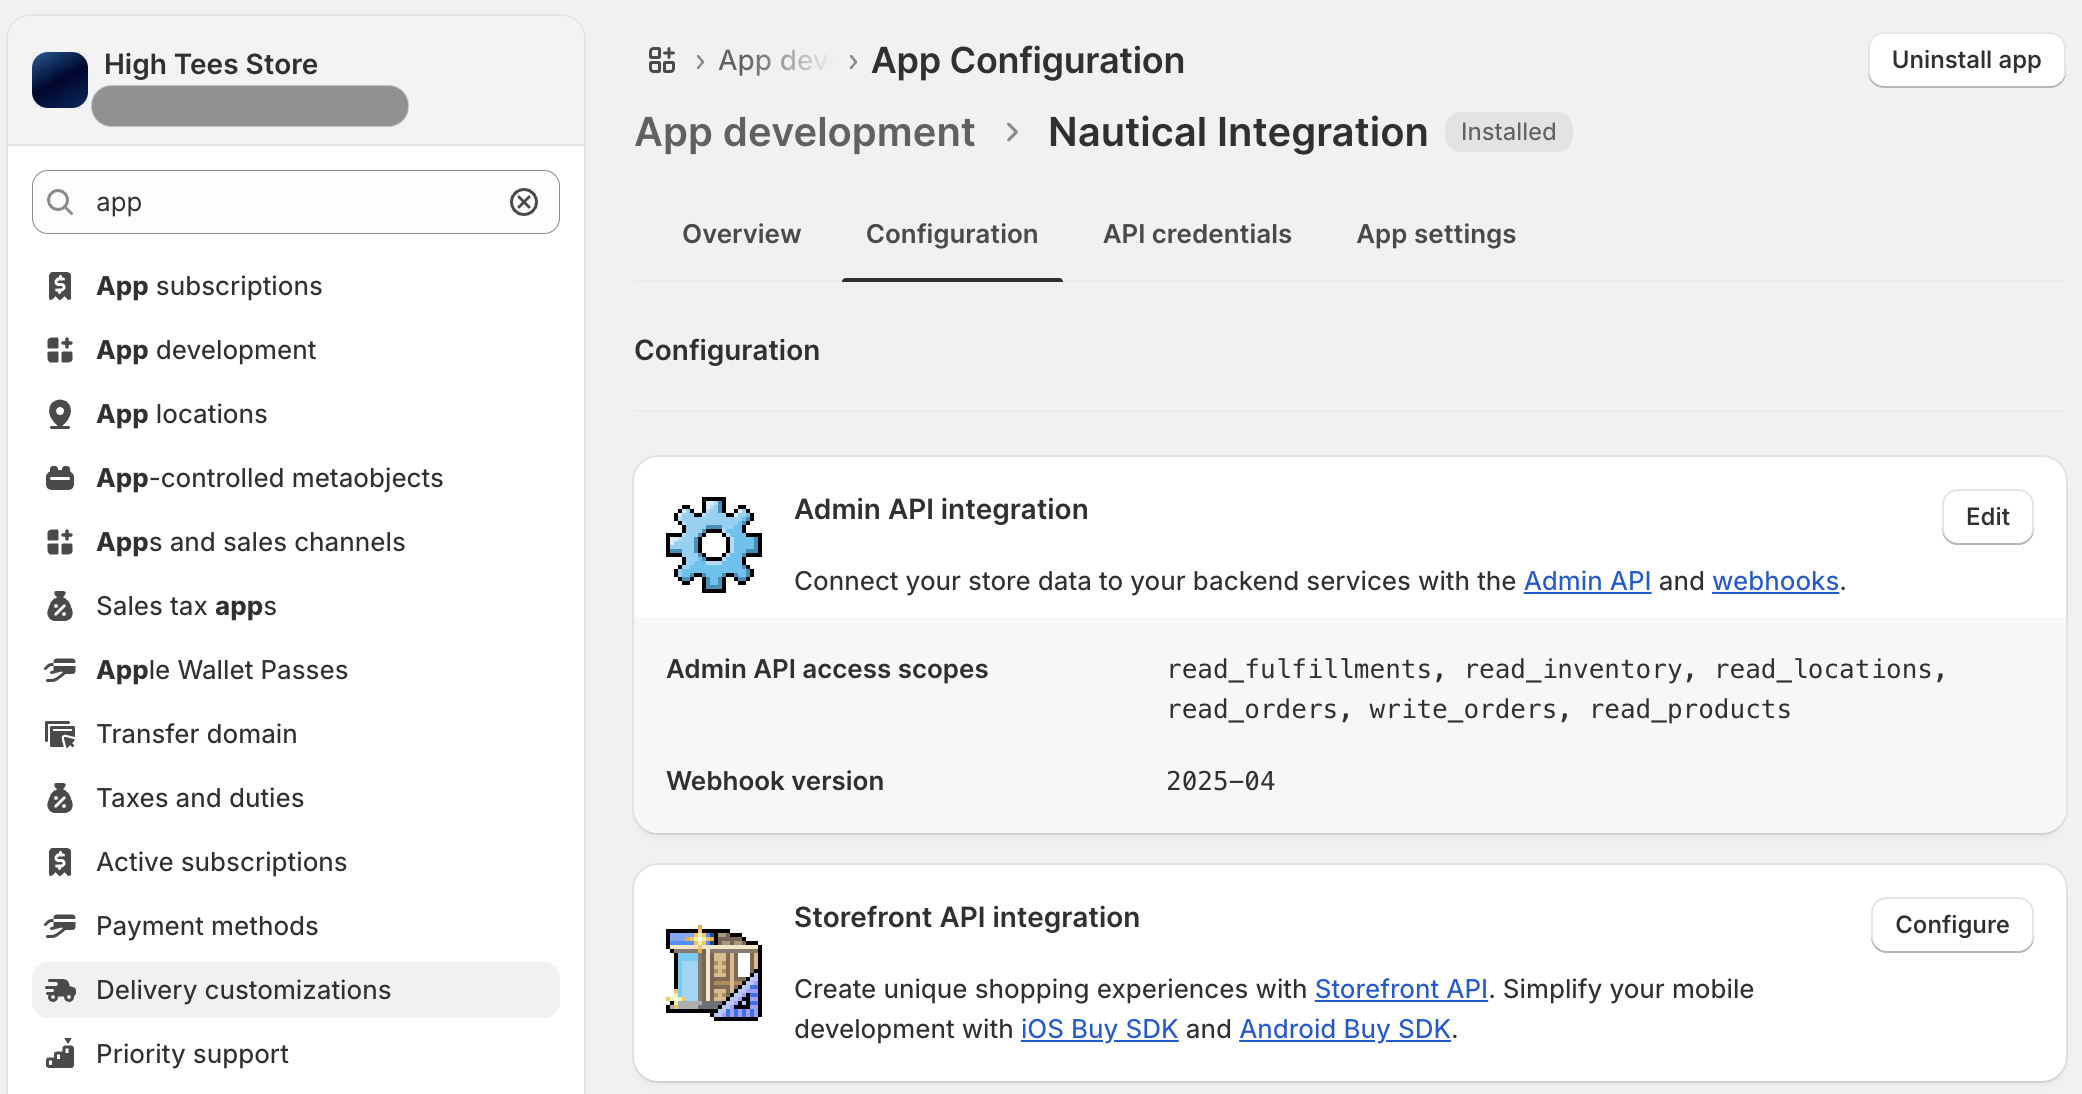
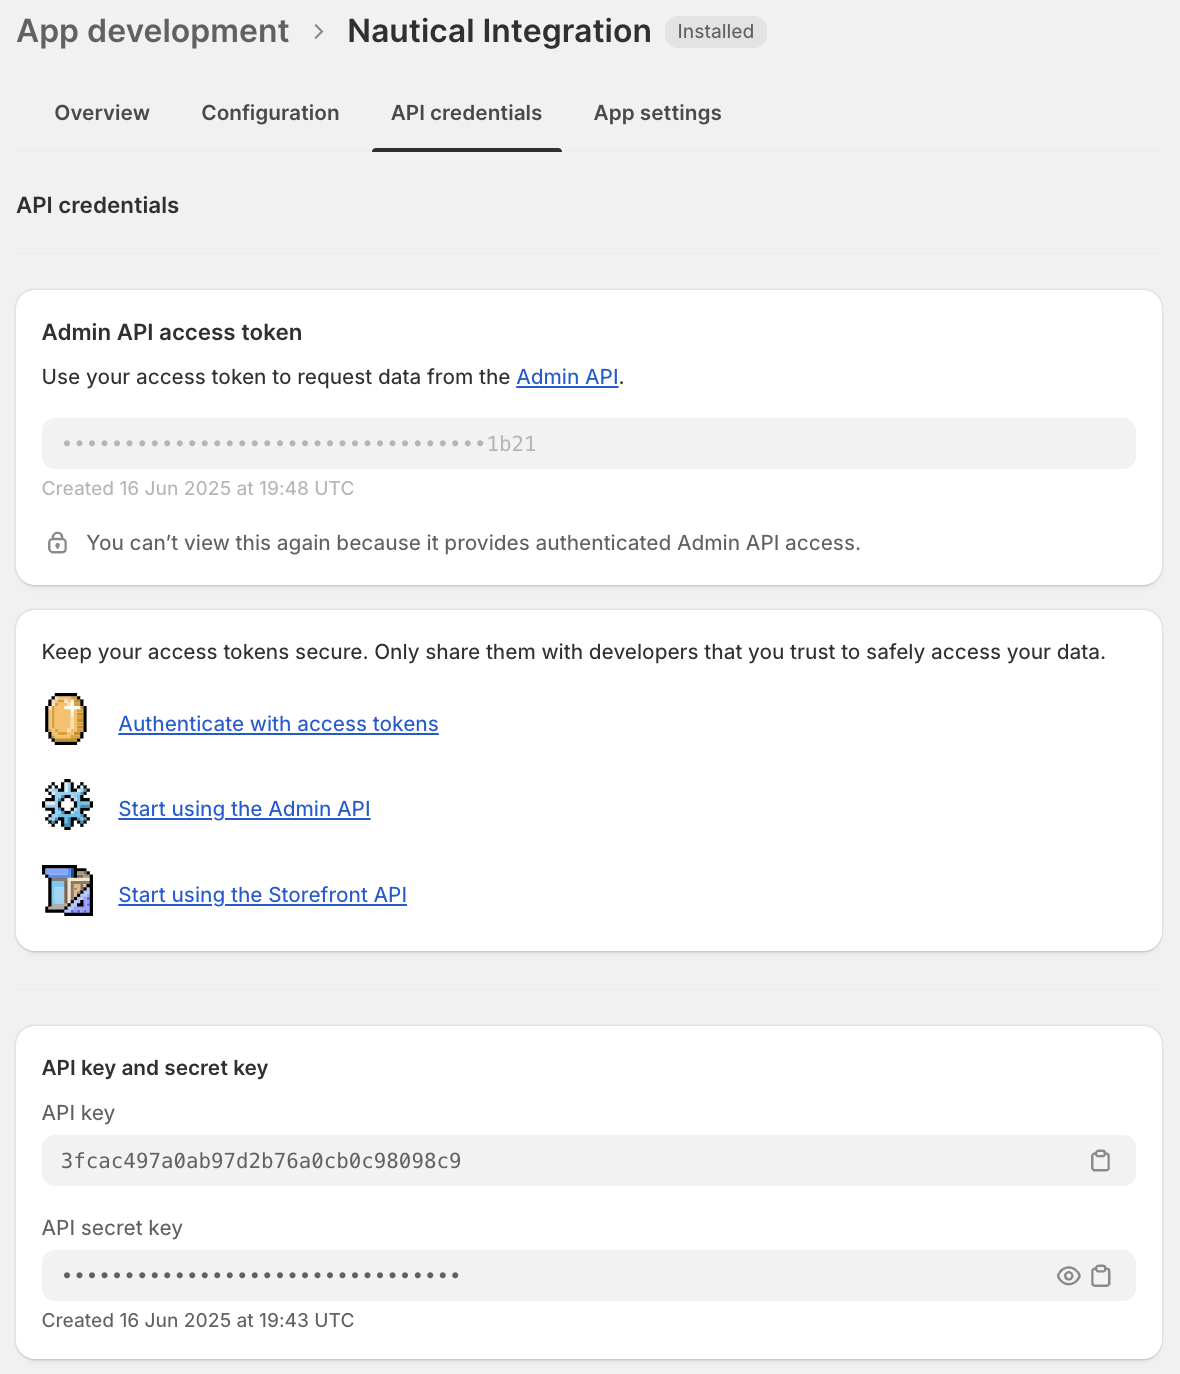
Retrieve API credentials
The custom app is where you must API keys required for activating the Traide plugin. Once the app is configured, along with the appropriate Admin API scopes, retrieve the following from the API Credentials tab:
- Admin API access token
- API key
- API secret key
Step 2: Activate the Shopify integration
After configuring Shopify with a custom app for the connection, you can activate the Shopify app in Traide to start syncing information between the two systems.
Before you start
Make sure to log in as the seller whose Shopify store you want to connect. Shopify configurations are seller-specific.
Steps
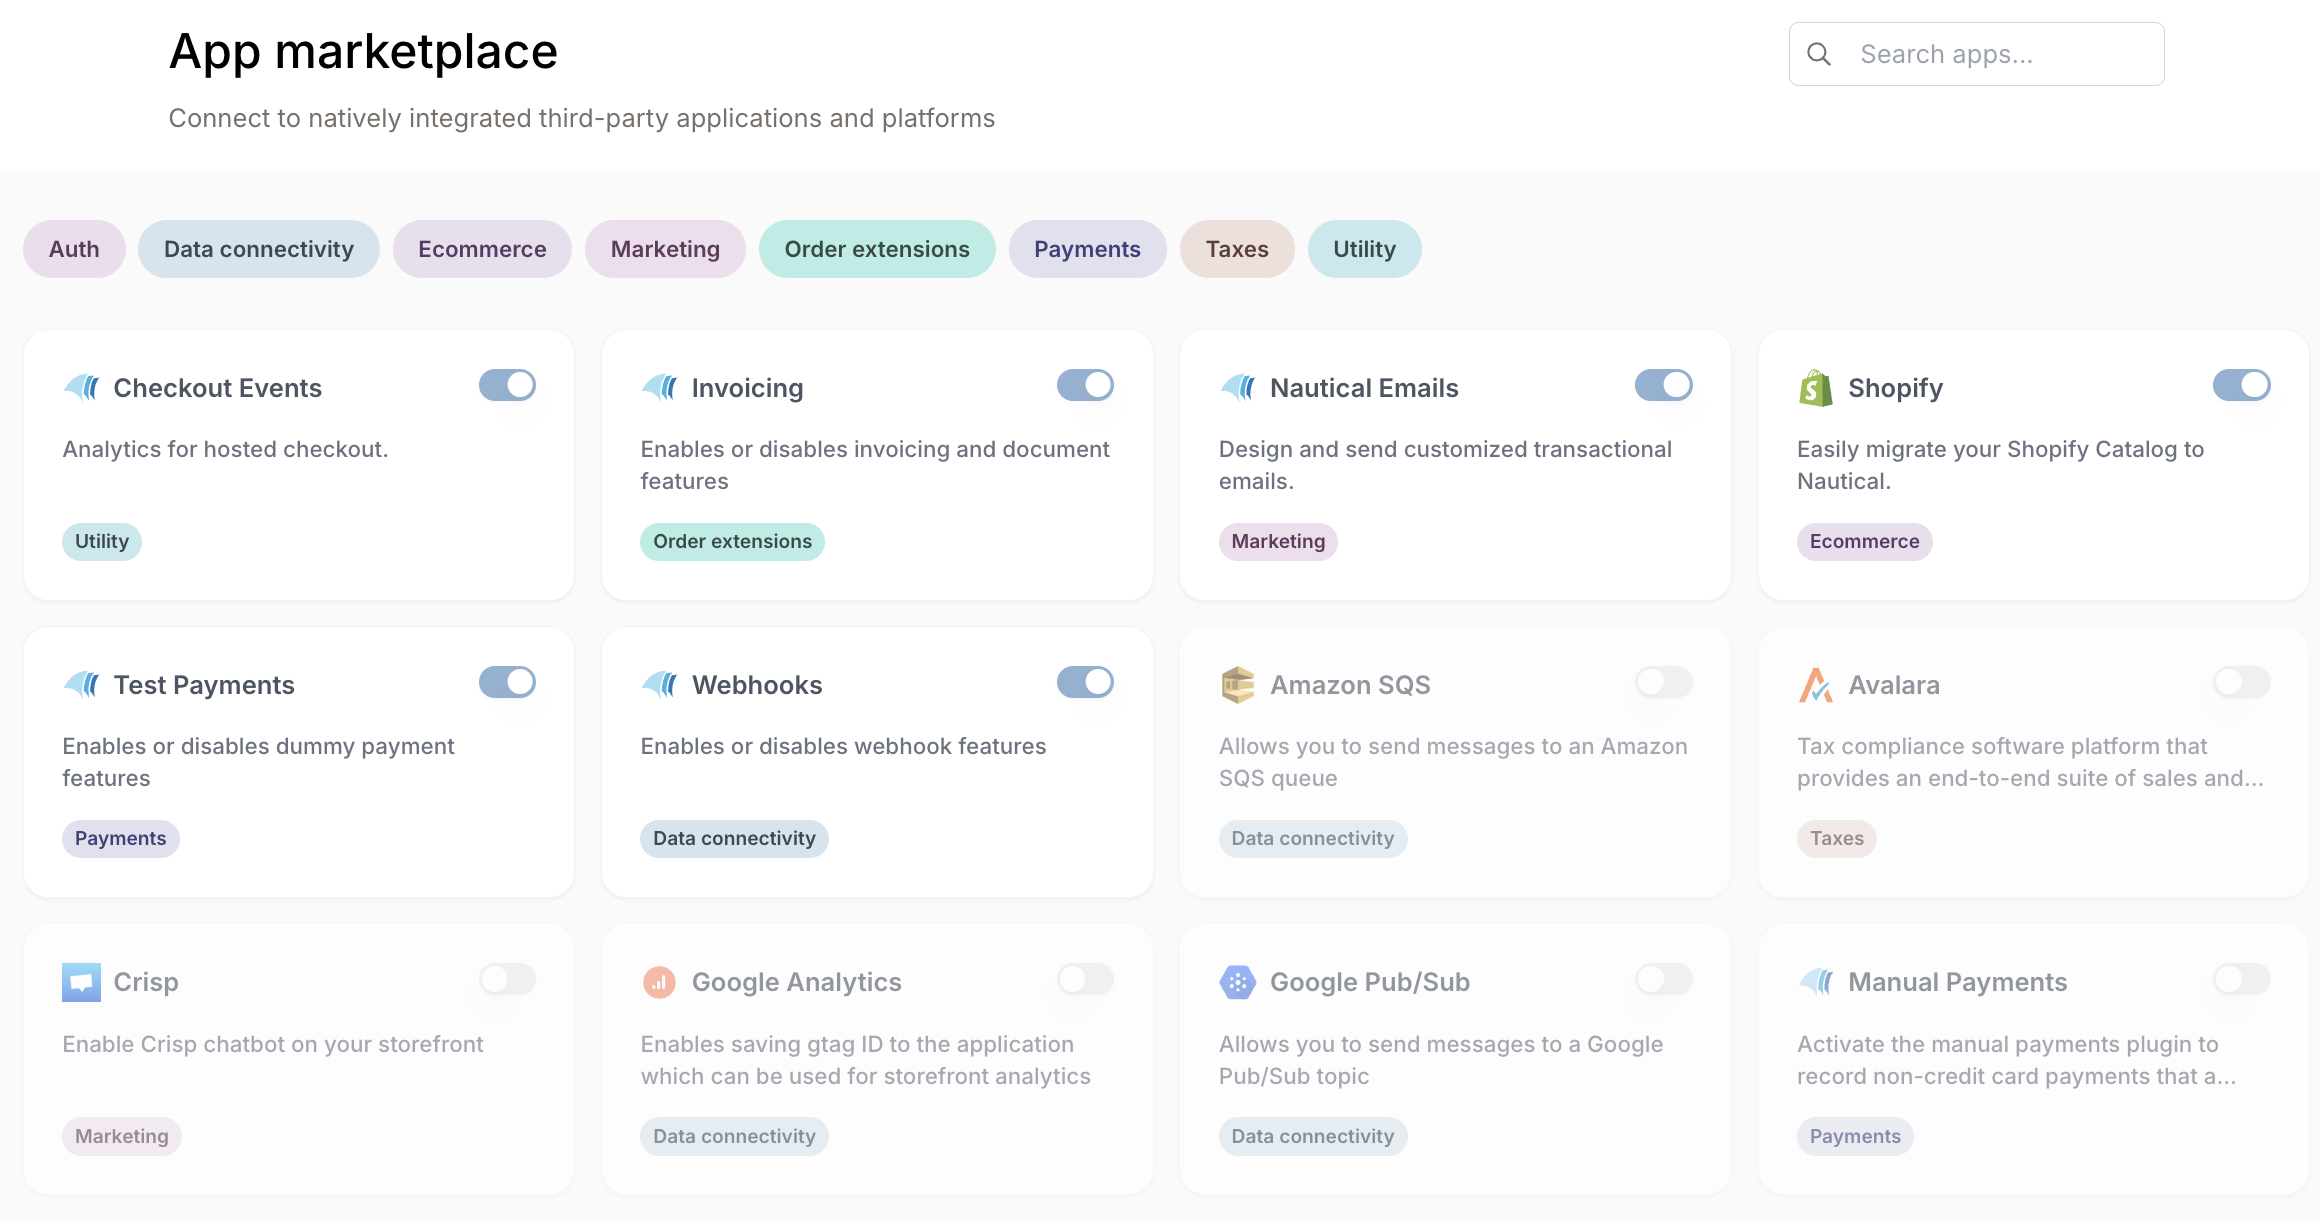
- In the dashboard, navigate to Settings -> Apps.
- Select Shopify.
| Field | Usage |
|-------|-------|
| Shop Domain | Enter your shop domain, such as `example.myshopify.com`. You can find this in your marketplace configuration settings, below your shop name and avatar. |
| API Version | Enter the API version used in your Shopify store setup. The default is `2025-04`. |
| Default Shop Currency | <p>Enter the 3-letter currency code for the seller's currency. This determines the currency used for imported product and variant prices.</p> |
| Admin API Access Token | Enter the Admin API access token retrieved from your [custom Shopify app](#retrieve-api-credentials). |
| API Key | Enter the API key retrieved from your [custom Shopify app](#retrieve-api-credentials). |
| API Secret Key | Enter the API secret key retrieved from your [custom Shopify app](#retrieve-api-credentials). |
4. Select Save. 5. Select Activate.
Step 3: Create a product in Shopify (optional)
If you already have products in your Shopify store, you can skip this step. However, you’ll still need to create templates and attributes in your marketplace that align with your Shopify product categories and variants.
The next step after activating your Shopify integration is to create a product in your Shopify store. You can do this via the following steps:
-
In your Shopify store, navigate to the Products section.
-
Select Add product.
-
Input your product details. In this example, we'll make use of the following values in the table below:
Section Input/Instructions Title Nike T-shirt Description Step up your style and performance with Nike T-shirts. Designed for comfort and versatility, these tees feature soft, breathable fabrics, and athletic cuts that move with you. Media Upload an image from your device Category Select T-Shirts. If the category for your product doesn't exist, select Uncategorized. Pricing Input your product's price. Tick the box that enables you to charge taxes on the product. Inventory Tick the box that enables you track the product's quantity. In the Shop location section, input the quantity of products in your store. Shipping Tick the box that confirms your product is a physical product. Variants Input the following options and their respective values: - Color : Blue, Red, Green
- Size : S, M, L
Search engine listing Ignore this section for now Status Active Publishing Ignore this section for now Product organization - In the Type section, input Nike.
- In the Vendor section, select your store.
- Ignore the Collections and Tags sections for now.
Theme template Select Default product. -
Select Save to save your product when you are done. The video below depicts what your product should look like when you are done creating it.
-
Navigate to Settings -> Location.
-
Select Add location.
-
Enter your store’s name and address. These will be imported into your Traide marketplace as the warehouse for this product.
Step 4: Define your templates and attributes (MPOs only)
If you're a marketplace operator, you’ll need to set up templates and attributes in your Traide marketplace that match the product categories and variants from Shopify. Setting this up is necessary as your sellers also need the template and attributes for their Shopify imports.
Define your template
- In your Traide dashboard, navigate to Products -> Settings -> Templates.
- Select Create template.
- In the Name section, input
T-shirts. - Select Create.
Define your attributes
-
In your Traide dashboard, navigate to Products -> Settings -> Attributes.
-
Select Create attribute.
-
Using the table below as a guide, create the following attributes:
Attribute name Attribute type Attribute values Color Dropdown - Red
- Blue
- Green
Size Dropdown - S
- M
- L
info- You can choose to lock the list of attribute values to ensure that sellers can only use the options you provide.
- Note that all matching Shopify variants will be required by default, no matter the attribute settings in your marketplace.
-
Select Save when you are done.
Step 5: Import your Shopify product catalog
After successful activation of the Shopify plugin, the Actions section appears, where you can trigger the import to Traide.
Steps
- In the dashboard, navigate to Settings -> Apps -> Shopify.
- Select Import Catalog.
- In the Choose an import method section, select All products, then select Import.
- Review the products imported, then select Next.
- Confirm your product template mapping for your templates and store fields.
- When your products are successfully imported, select Back to products to view them.
Mapping Shopify fields with Traide
During import, each Shopify category will be mapped to a corresponding product template in the marketplace. The attributes on the product template determines which variant options are allowed. As a result, all products within the same Shopify category must have the same set of variant options for them to be successfully imported.
For example, if you have the following products and their respective categories on your Shopify store:
| Product name | Category |
|---|---|
| Nike t-shirt | Clothing |
| Reebok sneakers | Shoes |
| Apple watch | Uncategorized |
These three categories need to be mapped to three product templates on your marketplace.
Although it's not required for your marketplace's template to be identically named to your product category on Shopify, It simplifies the product import process. Let's say you have these three product templates on your marketplace:
- Clothes
- Footwear
- Accessories
These templates can be mapped to your Shopify categories using the following format:
| Shopify Category | Traide Product Template |
|---|---|
| Clothing | Clothes |
| Shoes | Footwear |
| Uncategorized | Accessories |
Also, the product options being imported from your Shopify store must match the variant attributes in the product template(s) to be mapped.
For instance, if your Nike T-shirt product has two variant options: Color and Size, you can map these options to a Traide product template with two variant attributes: Shirt color and Shirt size using the following format:
| Shopify variant options | Traide variant attributes |
|---|---|
| Color | Shirt color |
| Size | Shirt size |
Just like with categories and templates, it's not required for your marketplace's variant attributes to be identically named to your store's variant options but this simplifies the product import process.
Ensure you map Shopify variants to Traide attributes with a similar data type. For example, variants with multiple options should be mapped to attributes with the Dropdown data type.
The following video depicts the import process from Shopify to your marketplace:
Result
All products, variants, and locations will be imported from Shopify.
The duration of the product catalog import depends on the size of the product catalog. The seller account who triggered the import will receive an Import Catalog Successful email once the import is complete.
Step 6: Tasks after product catalog import
After importing products from Shopify, additional work may be required to do the following:
-
Assign shipping zones: To enable checkout and calculate shipping rates, you need to create shipping zones and assign them to each warehouse imported from Shopify. Follow the steps provided here to set up a shipping zone.
-
Assign categories: Marketplace categories will need to be created and assigned to the imported products before they can be published to the storefront. Follow the steps provided here to create a category.
-
Approve products (if required): If products require approval in the marketplace, the operator must approve each imported product and variant before they are available for purchase. Learn more about product approvals here.
How product catalog data is imported
At a high-level, the following entities are imported from Shopify:
- Products -> Create products, product templates, and categories
- Variants -> Create variants and variant attributes
- Locations -> Create warehouses
The following sections explain how fields and other data from Shopify are imported to Traide.
Shopify product import
During Shopify catalog import, products create products, product templates, and categories in Traide.
The following product data is not imported from Shopify:
- Tags
- Compare-at-price
- Cost per item
- Barcode (ISBN, UPC, GTIN, etc.)
- Continue selling when out of stock
- Metafields
The following data is imported from Shopify products. Select a data point to learn how Traide imports the data.
Source
Products from Shopify are marked in Traide with externalSource set to nautical.fulfillment.shopify.
Product ID
Populates the product externalId API field. You can find the product ID from the last part of the URL when viewing the product in your Shopify admin console.
Title
Used for the product "Name" and "Slug". The first 70 characters generate the "SEO Title".
Description
Populates the product "Description". The first 300 characters generate the "SEO Description".
Media
Images from Shopify are imported to the product. Image descriptions are not imported.
Charge tax on this product
Toggles the "Charge taxes on this product" field on or off in Traide.
Track quantity
Toggles the "Track Inventory" field on or off in Traide and determines how quantity is imported for the product.
Shopify variant import
During the import process, each individual product variant from Shopify is imported into Traide. The variant options, such as size or color, are imported to create variant attributes on the product template.
The following variant data is not imported from Shopify:
- Compare-at-price
- Cost per item
- Barcode (ISBN, UPC, GTIN, etc.)
- Continue selling when out of stock
The following data is imported from Shopify variants. Select a data point to learn how Traide imports the data.
Default variant
The first variant in Shopify is set as the default variant in Traide.
Variant ID
Populates the product externalId API field. You can find the variant ID from the last part of the URL when viewing the variant in your Shopify admin console.
Images
Variant images from Shopify are imported to the product and selected on the variant.
Variant options
Each option and its values are imported to create "Attributes" that are populated on each product variant.
These options are added as variant attributes on the product template created for the product.
Price
Populates the "Price".
The price "Currency" is set using the "Default Shop Currency" configured on the Shopify plugin.
Charge tax on this product
This setting toggles the "Charge taxes on this product" field on or off at the product level, but it is imported only from first variant in Shopify at the time of import.
SKU
Populates the "SKU" field on the variant. If blank, a default SKU is assigned.
Track quantity
Toggles the "Track Inventory" field on or off and determines how quantity is imported for this variant.
Quantity
Sets the inventory available at each warehouse, which you can view from the variant "Inventory" section. If quantity is tracked on the variant, the exact amount of stock available at each location is imported. Shopify locations are imported as warehouses.
Shopify locations import
Locations are imported as seller warehouses in Traide.
Shipping zones are not imported from Shopify. You must assign the appropriate shipping zones and rates to each warehouse imported from Shopify, otherwise buyers will not be able to purchase products imported from Shopify.
The following data is imported from Shopify locations. Select a data point to learn how Traide imports the data.
Seller
The owner of each imported warehouse is assigned to the seller attached to the Shopify plugin configuration.
Address
The location address fields are imported to the warehouse address.