Accepting payments with Stripe
Capturing payment through an integrated gateway like Stripe is essential for finalizing an order. This article explains how Stripe payments function within the Traide platform.
Traide and Stripe integrate seamlessly throughout the payment process, utilizing APIs and webhooks to ensure smooth and secure transactions. The storefront already includes Stripe checkout functionality.
To begin accepting payments with Stripe, you first need to activate the Stripe app within Traide. For detailed instructions on enabling this integration, see Connect Stripe Payments and Payouts.
Stripe payment flow
In a standard Stripe implementation with Traide, the payment process goes as follows:
- Initiating Stripe payment: When a buyer initiates checkout, Traide requests a Stripe payment intent for the order total using the
getClientSecretquery. - Generating payment form: The payment intent secret key returned from Stripe is used to securely generate the payment form.
- Capturing payment method: The buyer enters their payment details, such as a credit card, and confirms the transaction.
- Completing payment: Once the payment is confirmed on the client, the following events happen in sequence on the backend to finalize the order:
- Attach Stripe payment method: Stripe attaches the inputted payment method to the payment intent.
- Create payment in Traide: Traide creates a payment against the order using the Stripe payment intent token with the
checkoutPaymentCreatemutation. - Complete checkout: Traide completes the checkout and creates the order using the
checkoutCompletemutation.
- Payment processing: After checkout completion, the payment is either authorized or captured automatically, depending on the configured Stripe payment capture mode.
Understanding payment intents
Payment intents are a core component in Stripe's payment process, ensuring precise and secure transactions. Traide uses a secure token, generated by Stripe and tied to a payment intent, to orchestrate payments seamlessly without directly handling sensitive PCI information, such as card numbers.
Stripe uses the payment intent to track the events against a payment lifecycle. It records any failed payment attempts, making sure that the customer is charged only once. Traide transmits key transaction details to the payment intent, including the customer ID, transaction amount, currency, and relevant metadata like the order number or checkout ID.
Handling payment intents
To generate a payment intent, Traide uses the getClientSecret query, passing details such as the amount and currency.
The query returns the payment intent token and client secret. The client secret is vital for capturing the payment method on the client side and should be handled with high security. The token is used to update and process the payment intent.
Payment intents require a linked payment method to complete a payment. There are two primary ways to link a payment method:
- Webform entry: Customers securely submit their card details directly into a Stripe-generated payment form.
- Payment method reuse: You can give returning customers the option to use a previously saved payment method by passing the
PaymentMethodTokenargument with thegetClientSecretquery.
For more detailed insights into the Payment Intent lifecycle and mechanisms, refer to the Stripe documentation.
Payment methods
The payment methods offered in your Stripe payment form depend on the payment methods you have enabled in your Stripe account. Refer to the Stripe documentation for information on enabling and configuring payment methods.
Stripe offers a wide range of payment methods, including credit cards, bank transfers, digital wallets, and more. Note that certain payment methods, such as Link and Apple Pay, require an additional step of registering your web domain to ensure they function properly.
Process a payment with Stripe
The following tutorial outlines how Traide's API completes a payment with Stripe as the payment gateway.
Before you start
You should already have a checkout session with checkout lines and shipping methods, so you can create the payment intent for the full order total.
Create a payment intent
Request a payment intent from Stripe for the full order total. Query the Stripe payment gateway to get a payment intent token. You can then use that token id to create the payment.
| Argument | Usage |
|---|---|
gateway | nautical.payments.stripe |
paymentInformation.checkoutId | The id of the Traide checkout session, which will be passed as metadata to the Stripe payment intent |
paymentInformation.amount | The total amount to authorize for the transaction |
paymentInformation.currency | The transaction currency |
paymentInformation.customerEmail | The customer's email address |
paymentInformation.customerId | The id of the customer saved in Stripe, if applicable |
For the full list of input options, see the StripeClientPaymentData API reference.
query {
getClientSecret(
  gateway: "nautical.payments.stripe"
  paymentInformation: {
    checkoutId: "Q2hlY2tvdXQ6NWEyZDQ5NTUtY2UwNS00YTZjLTkyNzEtNjdmMjY0ZWNlNDFl"
    amount: 205.68
    currency: "USD"
    customerEmail: "buyer@example.com"
    customerId: "cus_PIruOzl2CNfhsq"
  }
)
Attach a payment method
A payment intent requires a payment method, such as a credit card or digital wallet, before it can be used to create a payment.
The buyer can choose their payment method and enter details from the front end using a Stripe-powered payment form. You will need to pass the payment intent secret key to render the form.
If you are using the headless storefront, buyers can input their payment method with the embedded Stripe payment element.

Create a payment
Register the payment against the Traide checkout session with the checkoutPaymentCreate mutation, using the payment intent token retrieved from the getClientSecret query.
Creating a payment requires the following arguments:
| Argument | Usage |
|---|---|
checkoutId | The id of the target checkout session |
input.gateway | Specify nautical.payments.stripe |
input.token | The id of the payment intent token, generated with getClientSecret |
input.amount | The total amount for the payment |
This step will fail if the Stripe payment intent does not have a payment method or if the amount exceeds the original value the payment intent was created for.
mutation {
checkoutPaymentCreate(
  checkoutId: "Q2hlY2tvdXQ6NWEyZDQ5NTUtY2UwNS00YTZjLTkyNzEtNjdmMjY0ZWNlNDFl"
  input: {
    gateway: "nautical.payments.stripe"
    token: "pi_3OUbY9Cp3bxKlBq10riUAx2u"
    amount: 205.68
  }
) {
  checkout {
    id
    token
  }
  payment {
    id
    chargeStatus
  }
  paymentErrors {
    field
    message
    code
  }
}
}
Complete the checkout
Once you have a payment, you can complete the checkout to finalize the order. Completing a checkout requires the following arguments:
| Argument | Usage |
|---|---|
checkoutId | The id of the Traide checkout session. |
volumeDiscount | The volume discount to apply. Leave as 0 if no volume discount applies. |
mutation {
checkoutComplete(
  checkoutId: "Q2hlY2tvdXQ6YWZlMzU4ZjctNTdkZC00NDU0LTg1OGEtNWFjYTlkYzAxMTNj"
  volumeDiscount: 0
) {
  order {
    id
    status
    }
  checkoutErrors {
    field
    message
    code
    variants
  }
}
}
Payment capture modes
The Automatic payment capture setting on the Stripe app in Traide determines when funds are captured. The following sections describe how payments behave depending on this setting.
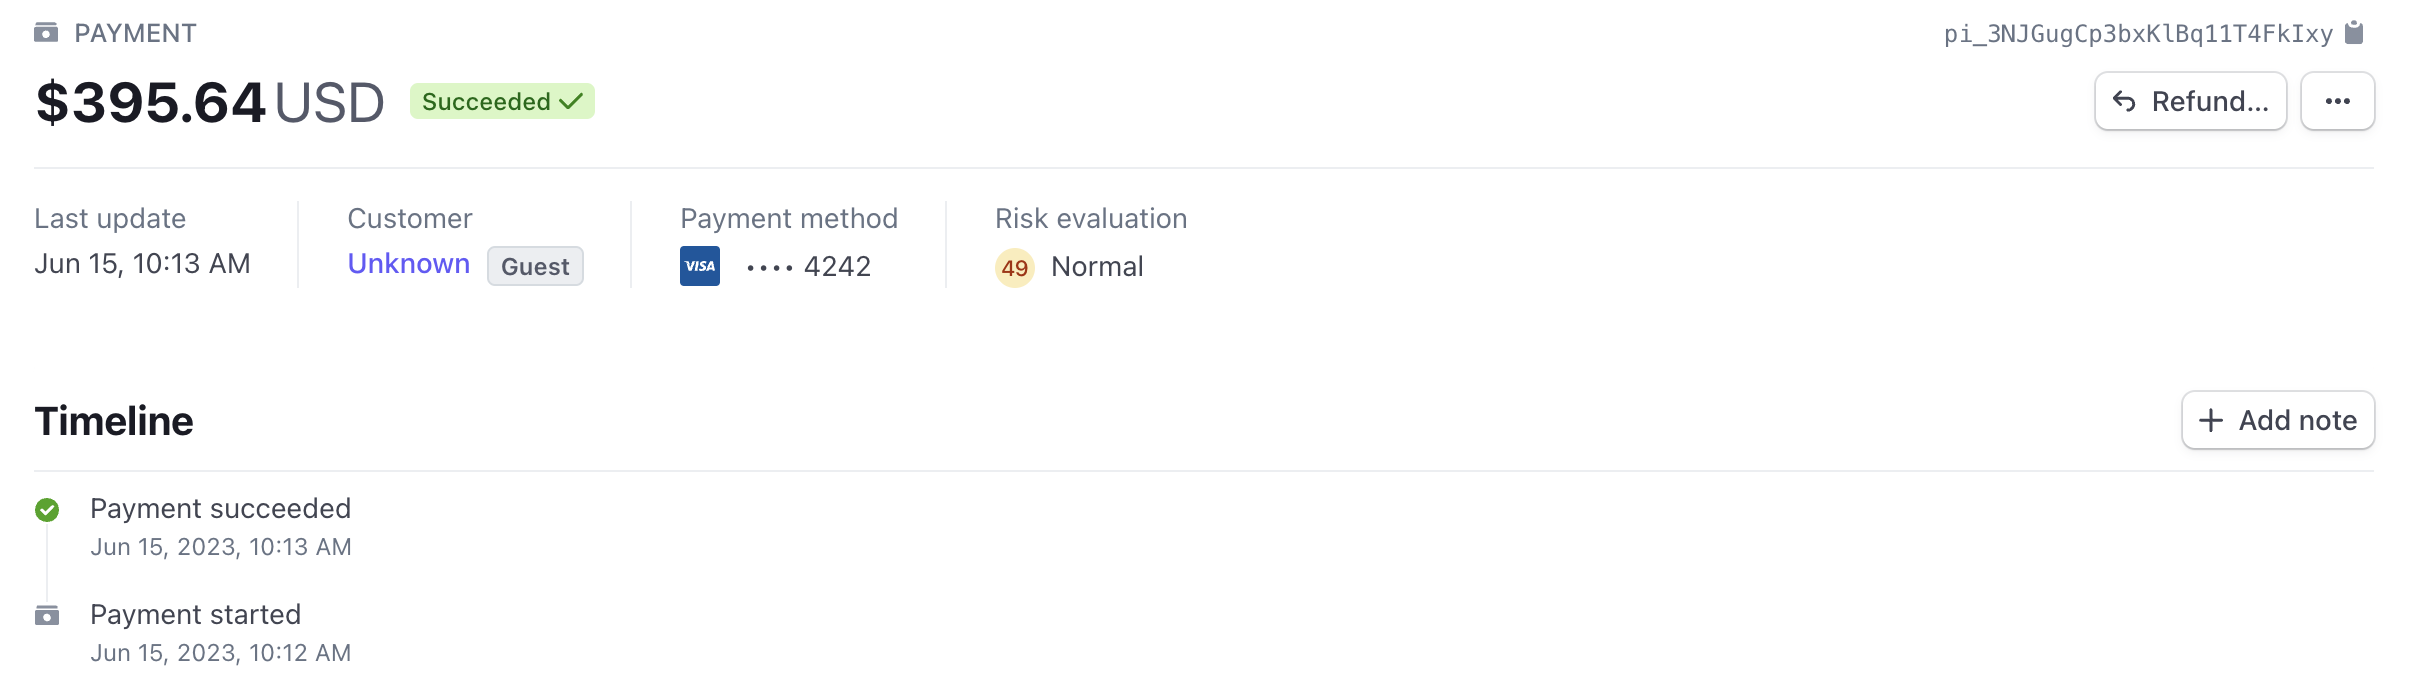
Automatically capture payments at checkout
When automatic payment capture is enabled, payments are captured upon checkout and shown in Stripe in the Succeeded state to indicate the payment is complete.
Consider the risks associated with automatic payment capture in relation to potential chargebacks or refunds. These risks may arise from various factors, including delayed fulfillment by vendors or inventory issues that the marketplace operator may not be aware of.
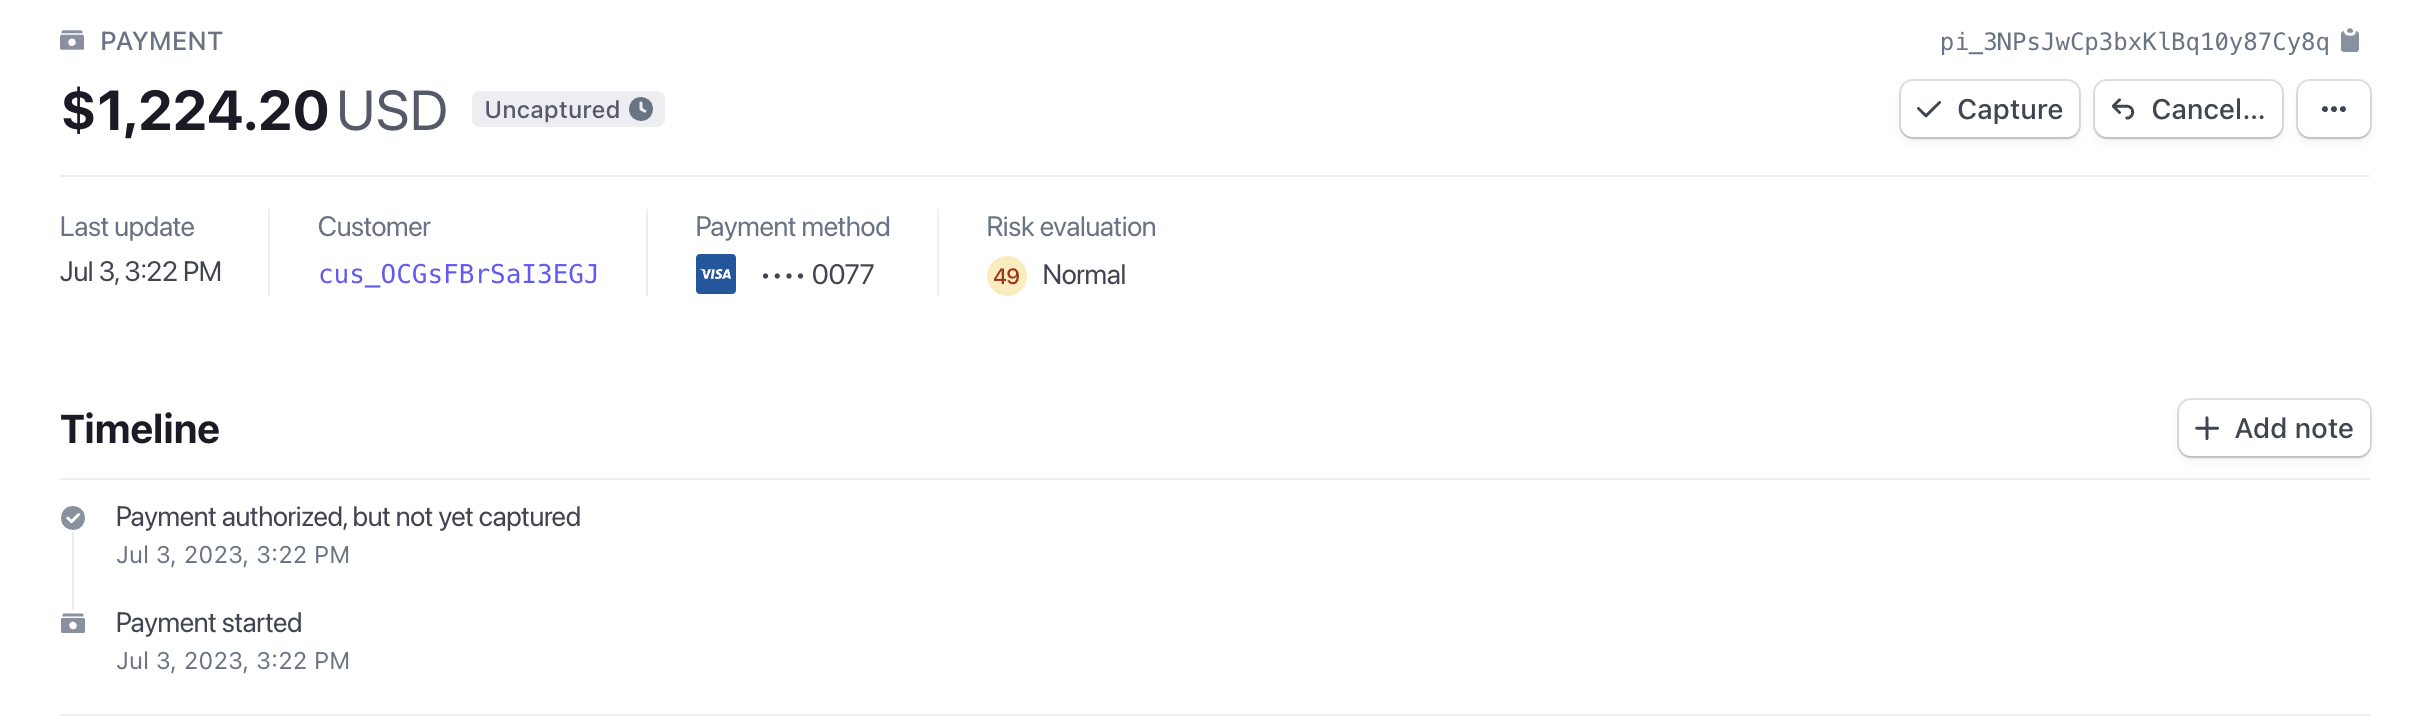
Authorize payments and capture later
When automatic payment capture is disabled, payments are authorized upon checkout but not yet captured. Payment details are sent to Stripe in the Uncaptured state. This mode requires an extra step for the marketplace operator to capture the payment on the order when ready.
Make sure to understand the authorization window for each payment method you support and have a system in place to capture payments before they expire. Most card authorizations expire in 5–10 days.
Capture an authorized payment
Payments are handled on the marketplace order. Unless auto-capture is enabled in your Stripe app, you need to capture payments as a separate step.
- Dashboard
- API
To capture a payment in the Dashboard, a marketplace operator can go to the marketplace order and select Capture:
To capture a payment using the API, use the nauticalOrderCapture mutation. This mutation triggers the charge.captured event on the Stripe side.
Stripe does not support partial payments. Make sure to capture the order total, as any remaining balance will be voided.
mutation {
  nauticalOrderCapture(
    amount: 205.68
    id: "TmF1dGljYWxPcmRlcjo2MA=="
    paymentId: "UGF5bWVudDo0MQ=="
  ) {
    order {
      id
      payments {
        capturedAmount {
          baseAmount
        }
        gateway
        paymentMethodToken
        paymentMethodType
      }
      status
      currency
      isPaid
      paymentStatus
    }
    orderErrors {
      field
      message
      code
      warehouse
      orderLine
      variant
    }
  }
}
{
  "data": {
    "nauticalOrderCapture": {
      "order": {
        "id": "TmF1dGljYWxPcmRlcjo2MA==",
        "payments": [
          {
            "capturedAmount": {
              "baseAmount": 20568
            },
            "gateway": "nautical.payments.stripe",
            "paymentMethodToken": null,
            "paymentMethodType": "card"
          }
        ],
        "status": "UNFULFILLED",
        "currency": "USD",
        "isPaid": true,
        "paymentStatus": "FULLY_CHARGED"
      },
      "orderErrors": []
    }
  }
}
Event tracking after payment
After the payment, Traide listens to Stripe webhooks to detect when the payment is successful. As part of activating the Stripe app in Traide, Stripe webhooks are automatically set up to send payment intent update events to Traide.
Traide listens to the following updates from Stripe and will update the payment status in Traide accordingly:
payment_intent.amount_capturable_updatedpayment_intent.canceledpayment_intent.payment_failedpayment_intent.processingpayment_intent.succeeded
This is particularly useful for Stripe transactions where payment completion is delayed, like ACH payments.
Processing fees
The marketplace operator is the merchant of record for transactions processed through Stripe. Consequently, the marketplace operator is responsible for paying the processing fees charged by Stripe for each transaction.
The processing fees incurred by the marketplace operator do not impact the balance eligible for payout to the sellers on the platform. The fees are separate from the funds that are distributed to the sellers as payouts.
Testing payments
If you're using the headless storefront to build your frontend, the Stripe payment form appears in the checkout once you activate the Stripe integration.
Stripe provides a list of test cards you can use to test payments. You must be using test API keys to use test cards. See Stripe's documentation on test cards
Once a payment is processed, it will appear on the Payments tab in your Stripe Dashboard:
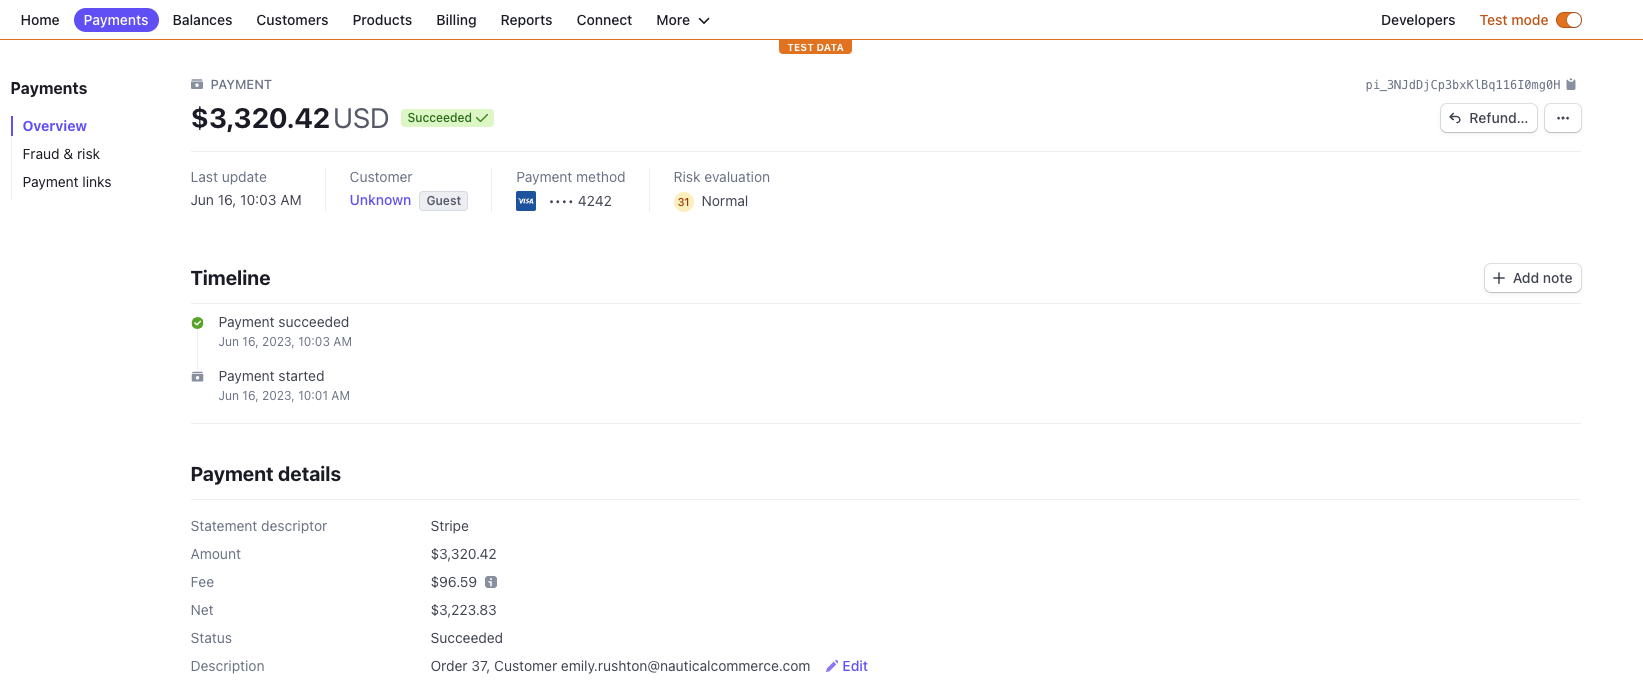
Traide sends the order data to Stripe. You can view the order data in the Stripe payment record. The payment description sent to Stripe includes the marketplace order number and the customer email address. The Metadata section shows the seller order number(s) and other metadata:
